Wednesday, August 21, 2013

Wedding Plate and Keepsake Tag

I did this wedding plate as a gift for a same-sex couple.  I was really kinda bummed out because I didn't have my SCAL to work with, so I did the best I could using only my cricut cartridges.  I guess it turned out ok.  I was feeling crafty and decided that I wanted to make a decorative keepsake tag to put on the package as well.  Their colors were black, red and yellow, but I decided just to follow a black and white theme throughout.    Below are the results.  TFL

Keepsake Wedding Tag
 Close-up of smaller tags hanging from larger tag
Keepsake page attached to package.

Friday, August 9, 2013

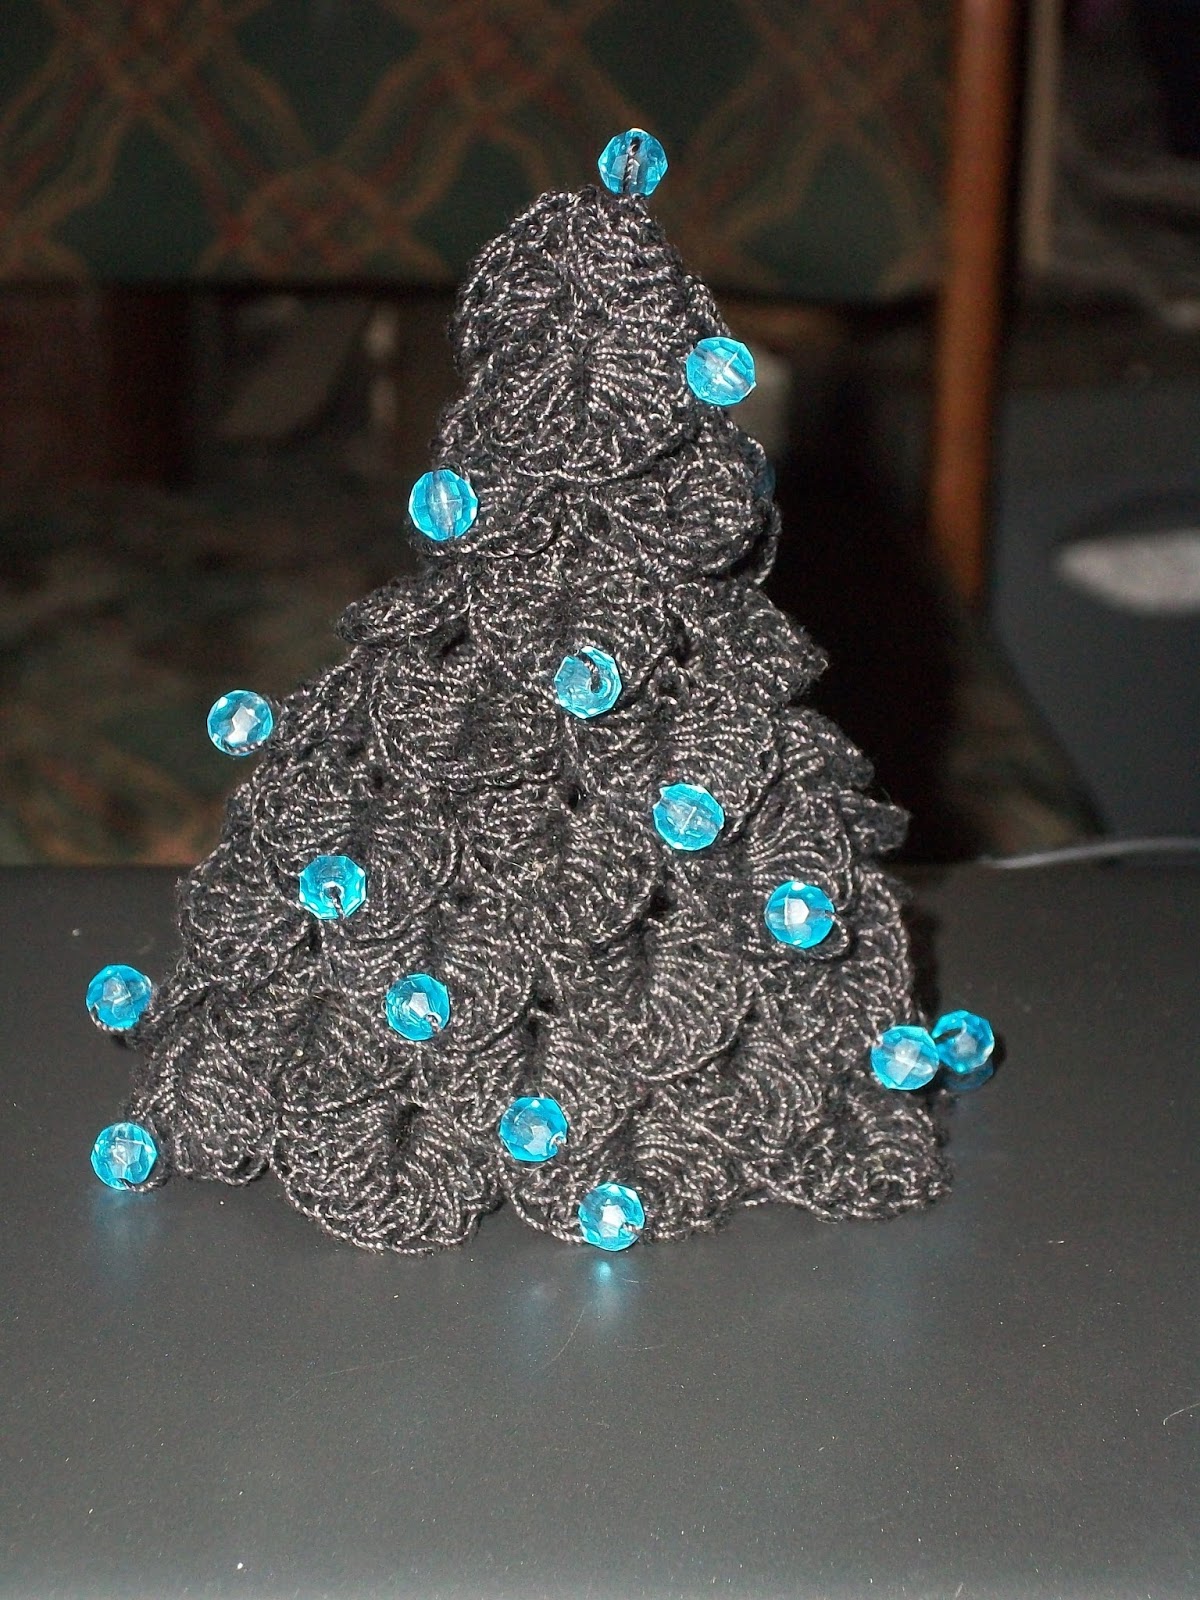
Crocodile Stitch Christmas Tree

Saw these adorable little Christmas trees on pinterest done in crochet yarn.  Wondered what they would look like using Crochet thread instead.  I had lots of turquoise beads and just decided to use black thread.  In the original pin that I saw, they sewed the beads on randomly after the crocheting was done.  On this particular project, I decided to thread the beads before I started crocheting and just slid them up the thread as I needed them.  It worked very well, but not so sure I like the outcome of pre-threading them.  I think I actually prefer the random look.  Live and learn through trial and error lol.  TFL
 This is what it looked like before stitching it together in back.
This is what it looked like after stitching, free standing and not yet formed.

Monday, August 5, 2013

Dual Color Braided Ribbon Wreath

After watching a tutorial yesterday on how to make the braided ribbon wreaths, I wondered why I haven't seen more than one color braided together and then wondered if it could even be done and still look good, so I sat down to try it.  This was the result.  It can be done!  For those of you who would like to know how, you can look up any tutorial on braided ribbon wreaths.  The difference in one and two colors is that with two colors, I did not fold my ribbon to find a center point.  Instead, I left a long tail and made my loop with both strands of ribbon held together.  Then just like the single color, I pulled the bottom color through the loop to begin the braiding process, leaving the second color hanging, while I pulled the loop down tight to secure both colors.  You then just alternate the colors, whatever color the loop is, you pull the other color through it.  When I got to the end, I wove both sides of ribbon though the opposite sides on the back to secure the wreath shape.  I then made a bow with both colors to put on the front bottom at the joining and secured it with hot glue.  I also glued a little loop to the back in order to hang it.  TFL

Easiest Ribbon Rose you will ever make!

All these years I have been rolling and folding my ribbon roses, sometimes they look beautiful, sometimes not so great and they had to be started all over...time consuming and tedious, especially if you want to make several.  Today I learned how to make them a different way, a way that is so simple, even your children can do it!  These would make great little roses for most any project and the best part is that you can use any size ribbon and the results will be equally as beautiful.  This would be a great project for mommy and daughter to do to make some cute little headbands.

For this tutorial, I used a 12 inch length of 1/2 inch ribbon. You will need more ribbon for the larger sizes.
Fold your ribbon in half and hold the center point between your thumb and pointer fingers.  Take the bottom ribbon and fold it over the top and hold it, you will simply continue to pick up the bottom ribbon and fold it over the top ribbon until the ribbon is completely folded.  It should be a nice little square shape of folded ribbon when you are done.   When you are have folded it as far as you wish to fold, hold on to the last two folded squares of ribbon and let the rest go.  I should then look like this:
close up view of what it looks like when you let loose of the squares.
You will then take the bottom ribbon, yet again, while holding loosely onto the top.  Pull the bottom ribbon as far as you can pull it and you will see the rose take shape before your very eyes!  This is what it will look like then:

Now you simply get out the hot or cold melt glue gun and secure the last two folds to keep the ribbon in shape.  Cut your ends so that they don't show and there you have a very easy, super simple, yet beautiful little rose.  My head is spinning thinking of all the things I can use these roses on!


Friday, June 28, 2013

Garden Maidens

I have a wonderfully creative friend named Deniece Halford.  She made these awesome garden maidens and they were just way too beautiful not to share with everyone.  I have wanted to make these every since I first saw them, but wouldn't you know it, I can't find the darn doll heads anywhere! :( boo hiss! lol.

She started out with three doll heads that she found at the thrift shop.
 Then she cut their hair very short.
once that was done, Deniece cut the tops of the heads off.  She said this was the toughest part as the heads were very stiff and sturdy.  Perhaps using tin snips after making the first initial incision would work much easier than using scissors.
Once this process was complete, she sprayed them with gray paint,
While the paint was still wet she sprinkled them with sand which gives the doll a faux concrete/hypertufa look.  The doll was then sprayed with clear varnish as a sealant.
Once they were thoroughly dried, she planted the plants of her choice and the result is this beautiful set of garden maidens.  You can find Deniece on Facebook.
By the way, the total cost of Deniece's Garden Maidens was as follows:
Total Cost = $14.00
$4 at thrift store for doll heads. $6 for plants, $4 for paint and varnish. versus the $108.00 ones that she viewed at her local garden center.  Now that is an amazing bargain! 

Wednesday, June 26, 2013

Hawaiian themed Birthday party

My beautiful grand daughter Gigi turned 6 today and she wanted to have a Hawaiian themed birthday party.


Her momma decided to make the cupcakes and cake for her birthday and I thought they turned out so cute that I just had to share them with you!  The pictures don't do justice to the real thing.  My favorite was the plumeria flower cupcakes that she made with Key Lime cake and pink lemonade frosting.  The flowers were done with marshmallow slices, if you can believe that and miniature marshmallows for the center and pink sprinkles for color!  She made it look so simple and they turned out so  beautiful!

The flipflops were just adorable and were done with pink lemonade cake and pink lemonade frosting,


The sand and surf cupcakes were key lime cake with vanilla frosting and graham crackers for the sand.  They were a big hit with the boys at the party.  TFL


Wednesday, June 19, 2013

Weddings, Weddings Weddings!

Gosh, I feel like I have been gone forever!  My computer gave up the ghost and I am finally back!
So many things to post but to start off today I am posting some recent things that I have done for some weddings.
The first is as set of  cups that the bride gave to her wedding party as gifts.  Her colors were mint and yellow.  When I first heard it, I was thinking...hmmm, I'm not so sure...but I have to be honest, I love this color scheme together.


The next items I did as gifts for a friends wedding presents.  Just a simple plate and a set of wine glasses that said bride and groom on them.  Not sure why the plate looks so dirty...it was actually crystal clear...maybe its my laptop reflecting on it ...anyway, I put green behind the second plate pic. to take care of the reflection glare. The plate was decorated for a Hawaiian themed wedding.  The flowers and flourishes are all done in light cream and the names and dates in white.


The last one was done as a result of the bride's mother falling in love with her daughter's wedding gift and asked me if I could do done very similar for her nephew's (the bride's cousin) wedding that was taking place in two weeks.  in case you can't read the second name it is Quyen, pronounced "Quinn"  TFL